Some deliveries may take a little longer than usual due to regional shipping conditions.

DOWNLOAD THE APP


Customer Services
Copyright © 2025 Desertcart Holdings Limited
DOWNLOAD THE APP


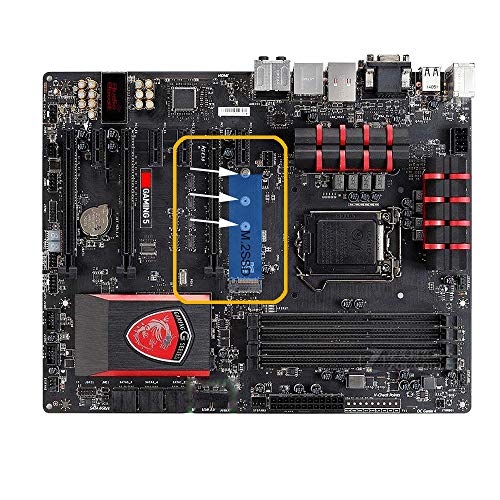


🔧 Secure your speed: Mount your M.2 SSD like a pro!
The SGTKJSJS M.2 NVMe SSD Mounting Screws kit includes 18 precision carbon steel screws and a screwdriver, designed for hassle-free installation of M.2 2280 SSDs on ASUS, MSI, and Gigabyte motherboards and laptops. Engineered for durability and universal compatibility, this kit is a must-have for tech professionals and DIY enthusiasts upgrading their storage with confidence.
| ASIN | B086WTZ5VZ |
| Are batteries included? | No |
| Best Sellers Rank | #57,621 in Computers & Accessories ( See Top 100 in Computers & Accessories ) #64 in Computer Screws |
| Brand | SGTKJSJS |
| Compatible groove diameter | 2 Millimeters |
| Country of Origin | USA |
| Customer Reviews | 4.7 4.7 out of 5 stars (1,163) |
| Date First Available | 18 May 2020 |
| Exterior Finish | Zinc |
| Fastener Size | M2 |
| Fastener Type | Machine Screw |
| Head Style | Flat |
| Head Type | Flat |
| Item Dimensions LxWxH | 8.1 x 0.8 x 0.8 Centimeters |
| Item Height | 0.3 Inches |
| Item Weight | 0.01 g |
| Item Width | 0.3 Inches |
| Item dimensions L x W x H | 8.1 x 0.8 x 0.8 Centimeters |
| Item model number | m2ls9t |
| Manufacturer | SGTKJSJS |
| Material | Carbon Steel |
| Metal Type | Carbon Steel |
| Model number | m2ls9t |
| Net Quantity | 1 Count |
| Number of Pieces | 18 |
| Product Dimensions | 8.13 x 0.76 x 0.76 cm; 0.01 g |
| Set Screw Thread Type | M |
| Size | M2 |
| Special Feature | easy to install |
| Specific Product Use | personal |
| Thread Class | M2.5 |
| Thread Coverage | Fully Threaded |
| Thread Size | M2 |
| Thread Style | Right Hand |
| Thread Type | M2.5 |
G**N
Great Product.
Great Product
S**L
Nice
Better product and good quality but price is high
S**I
Perfect Fit
These screws fit my Asus x570e Strix motherboard perfectly. I was a bit worried that these could be laptop specific but they fit my PC motherboard quite well. Screw and Sleeve quality is very good. Wish the bundled screw driver was magnetic. Gets a bit tedious with those small screws but was able to fit them without issues.
J**Z
Me sirvió para mi laptop ASUS. Encaja sin problema. Gran compra sobretodo por la variedad del paquete.
B**E
Exactly as advertised. Has multiple hold down and screw sizes for different boards and works without issue.
S**7
Great !! It comes with 3 different set of screws option and there's one that fit nicely for my Gigabyte X570 Aorus Master NVME M.2 mainboard. Shipping using Amazon Prime is really fast.
S**O
For whatever reasons, manufacturers of M.2 devices "forget" to include the stud and screw needed to install the device to the computer instrument it needs to be attached to. Amazon sells several of these kits, in different configurations. In my experience, this is the better of these kits.Depending on your hardware, there are several different size fasteners needed for the task. Some other kits give you enough hardware for one or two installations, but not necessarily the right sizes. This kit comes with three sets in three sizes. When installing the M.2 device, start wit the new M.2 safely in the package it was dispensed to you. Instead, find a little magnet, and spread all the pieces in the magnetic tray or over the dace of a magnet. Then, with a good light, a dose of patience, and perhaps a magnifying lens (as your age and health dictate). Find the area of your computer (Mother-Board) where the card is supposed to be mounted and study it a bit. A YouTube short presentation may help. This system is a bit unusual and it will not hurt to get acquainted with all the participants before the fin begins. Next, install the heat-sink to the device, paying attention to pesky details. (Assuming the <.2 device is to be mounted parallel to the MB), measure the length of the M.2. This will hel0p you decide which mounting hole to use. Almost without exception, you will need a stud; the M.2 needs to go over the mounting holes/bases pput there for the shorter sizes. Going over them without touching; the studs are metal, the bottom of the M.2 is full of signal traces, metal to metal contact means trouble, etc. Install the stud in the appropriate hole. Finger tight is good enough, unless you have the proper tools. Next, the M.2 card needs to be gently inserted into the special socket (about 30 degrees angle), and then gently lowered onto the stud you just finger-tightened above. Hold the M.2 down and start a screw into the stud. fasten the screw gently. No need to torque anything, jsut tight enough so normal handling will not loosen it. Suggestion: Get yourself a tiny magnet. If it is small enough, attach it to the shaft of the tiny screwdriver that came with the kit. If not, try to rub the screwdriver with the magnet, a few times, but not back and forth. The goal is to make the screwdriver slightly magnetized. This way you will be able to pick up the screw with the screwdriver. Whatever you do, do NOT drop the screw or the stud into a crevice in the computer. If you do manage to do that, make absolutely sure you find the screw before you apply power to that computer. None of this has anything to do with this kit, but it is information surprisingly many do not possess.
A**N
I have no complaints. It does its job and holds my ssd in with no issues.
Trustpilot
2 weeks ago
5 days ago